DIY LPG Conversion, the Aircooled Way
Is it possible to convert an old VW bay window T2 to run on LPG instead of petrol? As petrol prices near me, rise, you might want to know that the answer is “yes” and I’ll show you how I did my LPG conversion.
Breakdown
- Total conversion cost £650
- Certificate for safety £35
- Vehicle 2 Litre 1976 Bay Window T2
Disclaimer: I have a 2-liter 76 bay that breaks down on every motorway he has ever been on. Before I start, please may I state that all I say is my opinion and open to suggestions. If you are not confident then seek further advice or get it done by a professional (make sure your van is running well before you start (unless you’re like me and just want to get it done and sort out the original problems later )) I DO NOT TAKE ANY RESPONSIBILITY FOR YOU BLOWING YOURSELF UP! I AM NOT A QUALIFIED LPG INSTALLER THEREFORE CAN ONLY DETAIL WHAT I DID, RIGHT OR WRONG.
The Regulations, Can I Legally Do It Myself?
Get yourself a copy of the cop 11 regulations! This is very, very important, these regulations are not the law, but they are bloody good advice! Read them and then read them again! Can you convert your van to LPG yourself? Well, that all depends on whether you are a competent person or not. The regulations state that an LPG conversion must be completed by a competent person. I felt competent, so I did it.
3 Choices to Make
- Choose your kit supplier, My kit was supplied by TinleyTech. Figure out what type of kit you require. My system is an open-loop system, a 70l upright toroidal tank with twin mixers. I have twin Solex carburettors, but you may only require a single mixer.
- Decide where you want to locate your tank. Will it go under the bed? Above the spare wheel compartment? This will determine the type of tank you will need, and the size you can fit in. When deciding on tank size, then obviously the space you have will determine this. Go for the biggest you can fit in. The tanks generally hold (as a safety measure) 20% less than they state, so a 70l tank will hold 56 litres. You generally get fewer Miles Per Gallon than on petrol, due to the nature of the gas. Figure out carefully the distance you will be able to go before needing to fill up. Having to switch back to petrol because you are miles away from an LPG vendor, will gut you, let alone eat into your payback time!
- Measure your carb(s) mouth (where the air filter fits onto the carburettor) Measure this to the millimetre, and pass these details to your kit supplier. They will provide the correct mixer(s) with your kit.
- Order your kit and fit it!
Ready, Steady, Go!
I may well make the LPG conversion sound like child’s play, but please don’t think for one minute that there won’t be grazed knuckles and the like. I just tend to forget the bad times and smile every time I fill up! Don’t be surprised if I suddenly say later on in the blog “oh yeah, I had that problem too!”.
What’s in the Kit?
The kit contains:
- your chosen tank and cradle
- : A Vaporiser (this turns liquid gas into low pressure vapour for your engine to suck in)
- mixers (these sit on top of your carb(s) and allow your engine to suck gas and air)
- Copper pipe covered in PVC (2 sizes , the larger bore is for filling and the smaller to feed the engine)
- Rubber LPG Fuel pipe (this goes from the vaporiser to the mixer(s) on the carb(s))
- Compression type gas fittings (these, with the aid of a spanner allow all your joints to be leak free)
- A power valve (this controls how much gas vapour you allow your engine to suck. A bit like your mixture screw on your carb)
- A couple of solenoids (these are electrically operated cut off valves for gas and petrol)
- A control switch and fuel gauge, for your cockpit
- A wiring loom (mine wasn’t long enough on a few wires so this might need adjustment)
- Some ducting (for running pipes and electrics through. Also for venting)
- : Detailed instructions (well, I did from my supplier! and a help line)
- : An exhaust probe (for heating the liquid gas, so your vaporiser doesn’t freeze up. You don’t have water in aircooled). These are are a bit of a grey area in respect to the cop 11 regulations and there are rumours of mini water system being used. The suppliers of these systems won’t even respond to you emails unless you are a trade LPG installer, so I wish you better luck in finding info than I managed to get!
- probably some other bits that I’ll remember as I post more details.
What Part of Your LPG Conversion to Do First, Not What I Did!
Don’t Fit the Tank Yet!
I fitted the tank, 70l upright toroidal (which you will pay a little more for). Mine sits just above the original spare wheel well, as shown in the image. My spare is on the front of the vehicle with a chalkboard on. The local kids take great joy in writing rude words on it (I like it really or I wouldn’t leave the chalk out!) DONT FIT YOUR TANK FIRST AS I DID! that’s what I learned. Figure out where you want it, put the cradle, and make brackets out of an old stairlift if you need to, (as I did) but don’t bolt the tank in place till later or you will be unbolting it again and again.

Fit Everything Else First
After fitting the tank, I went along the route of fitting everything else except the pipe work and wires. You wouldn’t know how much pipework you needed, until you have the main components in place. Next I fitted the vaporiser in the engine bay, bolting it to the spare wheel well. Just above the vaporiser and nearer the back of the vehicle, I bolted the LPG cut-off valve to the spare wheel well. You can see these in the picture below.

Fitting the Mixers
The mixers slip on top of your carburettors (if they are the right size!), and then you pop your air filter on top of the mixers, simple! Actually what really happens is, you try to sit them on top of the carbs, figure that they are too small. Get the supplier to send 2 new ones a few mm bigger. Next you realise that the arms on your airbox, that feed the air, are to low to fit on-top of your mixers. Next you chop off the bottom of your air filter arms badly with a hacksaw, and then use high temperature silicone to seal, until you think of something better! See the images below.

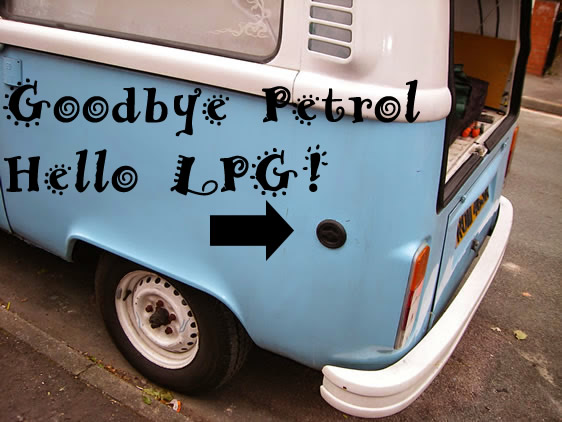
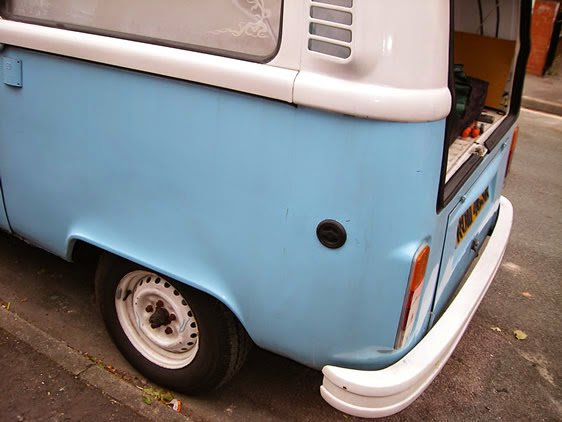
Let’s Cut a Hole in the Side of the Van
Purchase a hole cutter and desecrate your poor bay for a new LPG filler. Position it somewhere strong to resist the pressure you put on when twisting the filler pipe on at the garage. Remember, the shorter the run from filler to tank, the quicker the fill at the service station. Get your filler as close to the tank as possible. When the tank filler is clamped in, Use a bit of silicone around it before fitting to prevent the new edge from rusting. Just as a note, I made life easier for myself by making sure the filler backed onto the engine bay. If it backs inside the living quarters then you will need to add venting pipes on the filler. If there was a leak during filling, the vent pipes would ensure your van wasn’t full of gas when you got back in!

Put a Stop to the Petrol and Fit the Exhaust Probe
Bolt in the petrol cut-off solenoid, I placed mine right at the back firewall, to the right, where my fuel pipe came up .

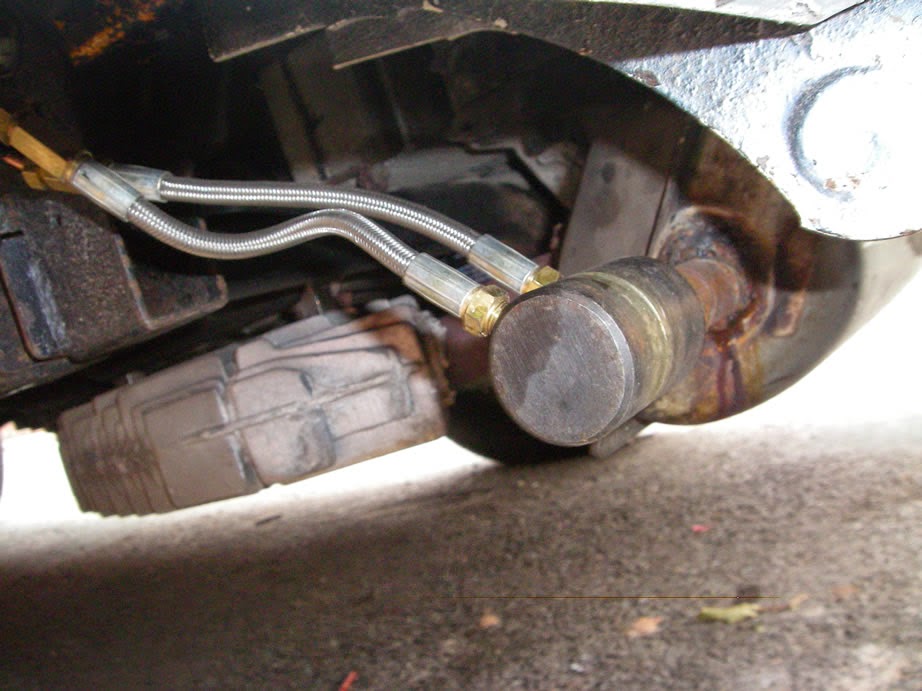
The exhaust probe is next. It’s about 12 to 15 inches long. Drill a hole in the side of your exhaust. My exhaust may be different from yours, so make your decisions where you think it may fit. Mine is shown in the image below. I managed to get it on the left of the exhaust running along the length. Simply drill a hole about the same size as the probe. Weld the little boss nut to the exhaust, insert the probe, and clamp it up!
How it really happened: Drill a hole in the exhaust, and make it a little bigger, because the probe won’t fit. Your masonry drill isn’t the tool for the job, but it’s the only thing you have that is long enough. Finally resort to angling the drill left and right, up and down, until the hole is then big enough for the probe. Slide in the probe only to realize exhausts contain baffles and these need to be drilled too. Only 2 baffles in mine it seems thank goodness! Slide the probe in. It’s a nice tight fit with no rattles hoorah! bolt it up.
Hang On, Let’s Figure Out How This All Works
Before we do the pipework let’s figure out how this system works, and then we can figure out where the pipes go!
High Pressure
You fill your van with LPG. That means the 8mm pipe needs to run FROM your filler TO your tank, easy! The liquid gas then has to come from the tank and be heated. If something were to go wrong with the exhaust probe, you would want to go through the LPG shut-off valve first. 6mm pipe from now on. FROM the tank TO the shut-off valve, FROM the shut-off valve TO the exhaust probe to heat the gas, FROM the exhaust probe to the vaporizer.
Low Pressure
After the vaporizer, we move into the rubber LPG pipe, because we are dealing with low-pressure gas vapour, not Liquid gas. RUBBER pipe from the vaporizer to the carb mixer(s), one or two depending on your carb setup. Now we need a way to control the amount of gas the carbs suck in, so you have a power valve that just jubilee clips between the vaporizer and carb mixer (before the pipe splits on twin mixers) it’s just a screw-in valve really that restricts the amount of gas you can suck: Bingo, that’s how it works.
Time to Vent
For a safe LPG conversion remember, LPG is heavier than air. Rest assured your tank is a sealed unit. Even the pipes to your tank are in a gastight box. Mine is in the middle of the upright donut tank with a vapour seal screw-on cover. The tanks are much safer than petrol tanks but I guess at the end of this conversion you still have a petrol tank so you may have slightly increased any risk of explosion.
The tank is going inside the van, whether you like it or not. From what I have read, you don’t have the clearance underneath and unless you put it on the front of the van like a spare wheel, and I think you and I know that isn’t a good idea even if it were legal! Putting the tank in the van means all pipes and electrics to the tank need to run INSIDE the plastic vent pipes that jubilee clip onto the tank and a bit of silicone sealer to make sure its gas tight. I used gas flue sealer because it’s temperature resistant and what I had lying around. Any pipework that comes from the tank must be vented to the outside world and that means OUTSIDE, not into the engine bay but somewhere it could blow away if there were a leak.
From the Filler
To get from the filler to the tank in my instance, I had to go FROM the filler to outside the van (just behind the rear wheel arch) and then back up through a vent pipe. That means that the other way round from the tank the pipe runs down a vent pipe to the outside world (back of the wheel arch and then back up to the filler. Is this necessary? Well, I feel safe, and that is how I read the cop 11 regulations.
To the Exhaust Probe
The pipe to feed the exhaust probe (through the LPG solenoid (shut off) needs to go from the tank, down one of the vent pipes (there are two vent pipes on my tank), through the engine bay floor (back of the wheel arch) and then back up to the LPG solenoid. All the pipework inside the engine bay doesn’t require venting because that’s where it all happens, but it is important to understand, to get those vent pipes from the tank to the outside. a full tank of gas in the height of summer may vent a little and you don’t want that IN your van or your Engine bay so OUT is the answer. Here are the vent pipes going through the spare wheel recess

and from a previous photo, going down through the engine bay and back up

and a view under and at the back of the rear wheel arch. The loops in the pipe aren’t exactly tidy but necessary to prevent vibration loosening anything.

So we’ve gone from the filler to the tank, from the tank to the LPG solenoid (via outside) then we are going back down to the exhaust probe, from the exhaust probe back up into the engine bay to the vaporizer and that’s the high-pressure stuff done!
No Pressure for the Low Pressure!
Pop your mixers on top of your carbs and pop your filter on top of the mixer (might be as simple as it sounds but unlikely). Take your rubber LPG hose from your vaporiser to the inline power valve, then to a “Y” piece (if you have twin carbs). This then goes to the feeds feeds on the mixer rings sitting on top of your carbs (that you had no problem fitting ). Here’s a photo of the power valve.

Now, my kit said that most idle systems on carbs take their air feed from after the petrol is mixed or something like that but on my twin Solex, I have a pipe that usually goes from the carb to the filter housing. this means at idle, there would be no gas going into the engine because all the idle suck is going through this pipe which has no gas in it so would (and did ) result in running at high revs but idle just stalls, so the idle pipe from the one Solex carb has to be fitted to an inlet on the side of the new mixer rings so it has gas to idle. The second lot of mixer rings I got from the supplier had this port with a blanking plug so it was easy.
Cut that Petrol Pipe
Now to cut off the petrol. This will seriously cut the petrol prices too. We’ve secured the petrol solenoid already to the firewall haven’t we, so basically we need to cut the main fuel/petrol pipe that feeds the carb(s), and pop one on either side of the solenoid. Hopefully, the pipe will be long enough or you will have mounted the solenoid in a place where the fuel pipe doesn’t bend too much. A bent pipe would restrict fuel or even collapse and block the fuel line.
Let’s Get Those Sparks Flying
LPG Solenoids
Now for the electrical side. What’s electrical? Let’s think… there are no less than three LPG cut-off solenoids, one already fitted to the tank, once you have fitted in the engine bay, and one built into my vaporizer, and guess what! They all have to work together! so that means a wire from the switch we are fitting in the dash ……

Run through conduit on the underside of the bus…

goes to the tank solenoid (through the venting pipe) and the solenoid in the engine bay. Then to the solenoid on the vaporizer. All these solenoids are then earthed to the bodywork with the rings and crimp spades provided. One wire runs to all the solenoids (positive) and then wires run from each solenoid to bodywork (negative). In theory, when you turn the ignition, all the valves will open together.
Petrol Solenoid
Next, we need a wire from the control switch (through the conduit on the underside) to the petrol cut-off solenoid. The other wire from the solenoid to earth/neg/bodywork. In theory, when we decide that we want to run on petrol, the switch control will (at the press of a switch,) turn off the gas and turn on the petrol. Consider this job as essential to beat the petrol prices.
Gas Gauge
Next, a wire from the control switch to the tank sender gauge (so you can tell how much LPG is in). Don’t forget to go up the vent pipe!
Safety Wire
The next wire goes from the control switch (mine needed lengthening) to the negative side of the coil. This is a safety feature, so if the engine stops then all the solenoids switch off too.
The Last Two Wires
Two more wires to do, in the cab, one positive off the ignition and one negative to bodywork. Bingo ready to commission.
Commissioning, Don’t Panic! Petrol Prices are About to Rise
You are a few steps away from beating the petrol prices. Here’s how I commissioned my LPG conversion: You want to see if the whole thing has any leaks BEFORE you fill it with gas. This way isn’t fool-proof but I found a pretty good way of checking. Get your foot pump and stick something rubber to make a seal against the filler. I used self-amalgamating electrical tape from an electrical supplier. press the pumps valve thingy with its new seal against the middle of the filler and get pumping. You’ll hear the air going in. Go on keep going!
Let That Compressed Air Through
Now it all depends on how you want to do this, I took a feed off one of the LPG solenoids back to the battery positive, seen as they are all wired together which means a positive feed to the positive connection on one of the solenoids will open them all. May I suggest you put a 5 amp inline fuse inline with this jump lead because if something isn’t wired right then that wire may decide to overheat, melt, catch fire, or fry your good work? Grab some leak detector spray (fairy liquid and water in a spray bottle) and spray all your joints looking for bubbles. You’ll hear hissing as the air comes out the vaporizer into the rubber LPG pipe and the carbs but this is normal. it’s everywhere else that you don’t want to hear the hissing or bubbling! check tank connections with leak spray.

and the exhaust probe. Everywhere you have put a fitting.
More Pumping
At this point, you will realize that you haven’t put nearly enough pressure in the tank with your foot pump to check all these because the hissing stopped 5 minutes ago so back to the pump. Go on go for 150 pumps this time!
Start The Van
So you’ve got no leaks and you are ready to test out your new switch. Start the van, a little red petrol light will be on the switch, it should start as normal because you haven’t done anything apart from cut the fuel pipe and put a solenoid in it. If it doesn’t start then get someone to turn the ignition on and off and see if the petrol solenoid is clicking open and shut as they do it (if not then check your wiring).
So it’s running on petrol (and costing you a fortune), press the control button and all the lights go off. This means petrol is cut off and gas, so how come it’s still running? Because you have to run the float bowls down as they will be full of petrol still. This, at idle, takes about three minutes on mine, but you are supposed to do this while moving, so wouldn’t take that long. Give it a rev and as the engine starts to die, press the control button again. The orange gas light lights up with a reading of how much gas is in the new tank. NOTHING! As the engine dies to a halt and you hear all the LPG solenoids shut off because the engine isn’t running. that’s good!
Now Here’s a Problem
Now, this is a bit of a bitch because you now have no gas or any petrol in your float bowls so it isn’t going to start easy (but worth it to test the system). Click the switch once more to get the red petrol light back on and turn it over till it starts, Hope you charged that battery!
The Scariest Trip You Will Ever Make
It’s time for the most nerve-racking outing of your life, and that’s to the nearest LPG filling station. Oh my god! Oh just before you go to the LPG station, VERY IMPORTANT!!! open all the solenoids with our little jump lead and let ALL the air out of the tank. If you don’t, you won’t ever get a full fill and it will cause running problems!!!! Remove the jump lead so they are all closed! Try to look like you know what you are doing even when you haven’t got a clue! Otherwise, it unnerves the forecourt staff. Read up on how the pumps operate because there are different ones and you don’t want to look too much of an idiot (though there are usually instructions on the pump) fill it up!
Over Cautious
I had the boot open, the engine bay, and kept stopping and listening and squirting with the leak detector spray. I don’t think all the people around were too happy with my actions but they hadn’t got to drive home in it! Fill it till it slows right down, it should read 20% less than your total tank size. Mine read 57 litres on a 70 litre tank. Go home and repeat the running on petrol and then emptying the float bowls and then switch to gas, you might have to do this a few times to bleed the system and get all the air out of the pipes. Mine fired pretty well straight away. Once it’s idling, SWITCH IT OFF, GET THE LEAK DETECTOR SPRAY, SPRAY ALL JOINTS AGAIN WITH SOLENOIDS POWERED AND CHECK FOR BUBBLES, THE HIGH PRESSURE OF LPG SHOWED A SMALL LEAK ON THE EXHAUST PROBE THAT NEEDED NIPPING UP A BIT TIGHTER, THAT THE FOOT PUMP METHOD DID NOT, SO CHECK IT ALL AGAIN!
The End, LPG Conversion Complete
Well, that’s a fitting end to today’s posts. Maybe I’ll talk you through the tuning later if many are interested, though I’m still mastering that! BUT DO TAKE IT TO BE CERTIFIED FOR THAT PIECE OF MIND. THE EXPERTS WILL CHECK IT ALL OVER AND SAY IT’S SAFE AS LONG AS YOU HAVE FOLLOWED THE REGS. FOR £35 IT AINT WORTH NOT HAVING IT DONE! (and for insurance purposes!).
Make sure you check and adjust your valve clearances before tuning the LPG system or you will end up doing it all again
UPDATE
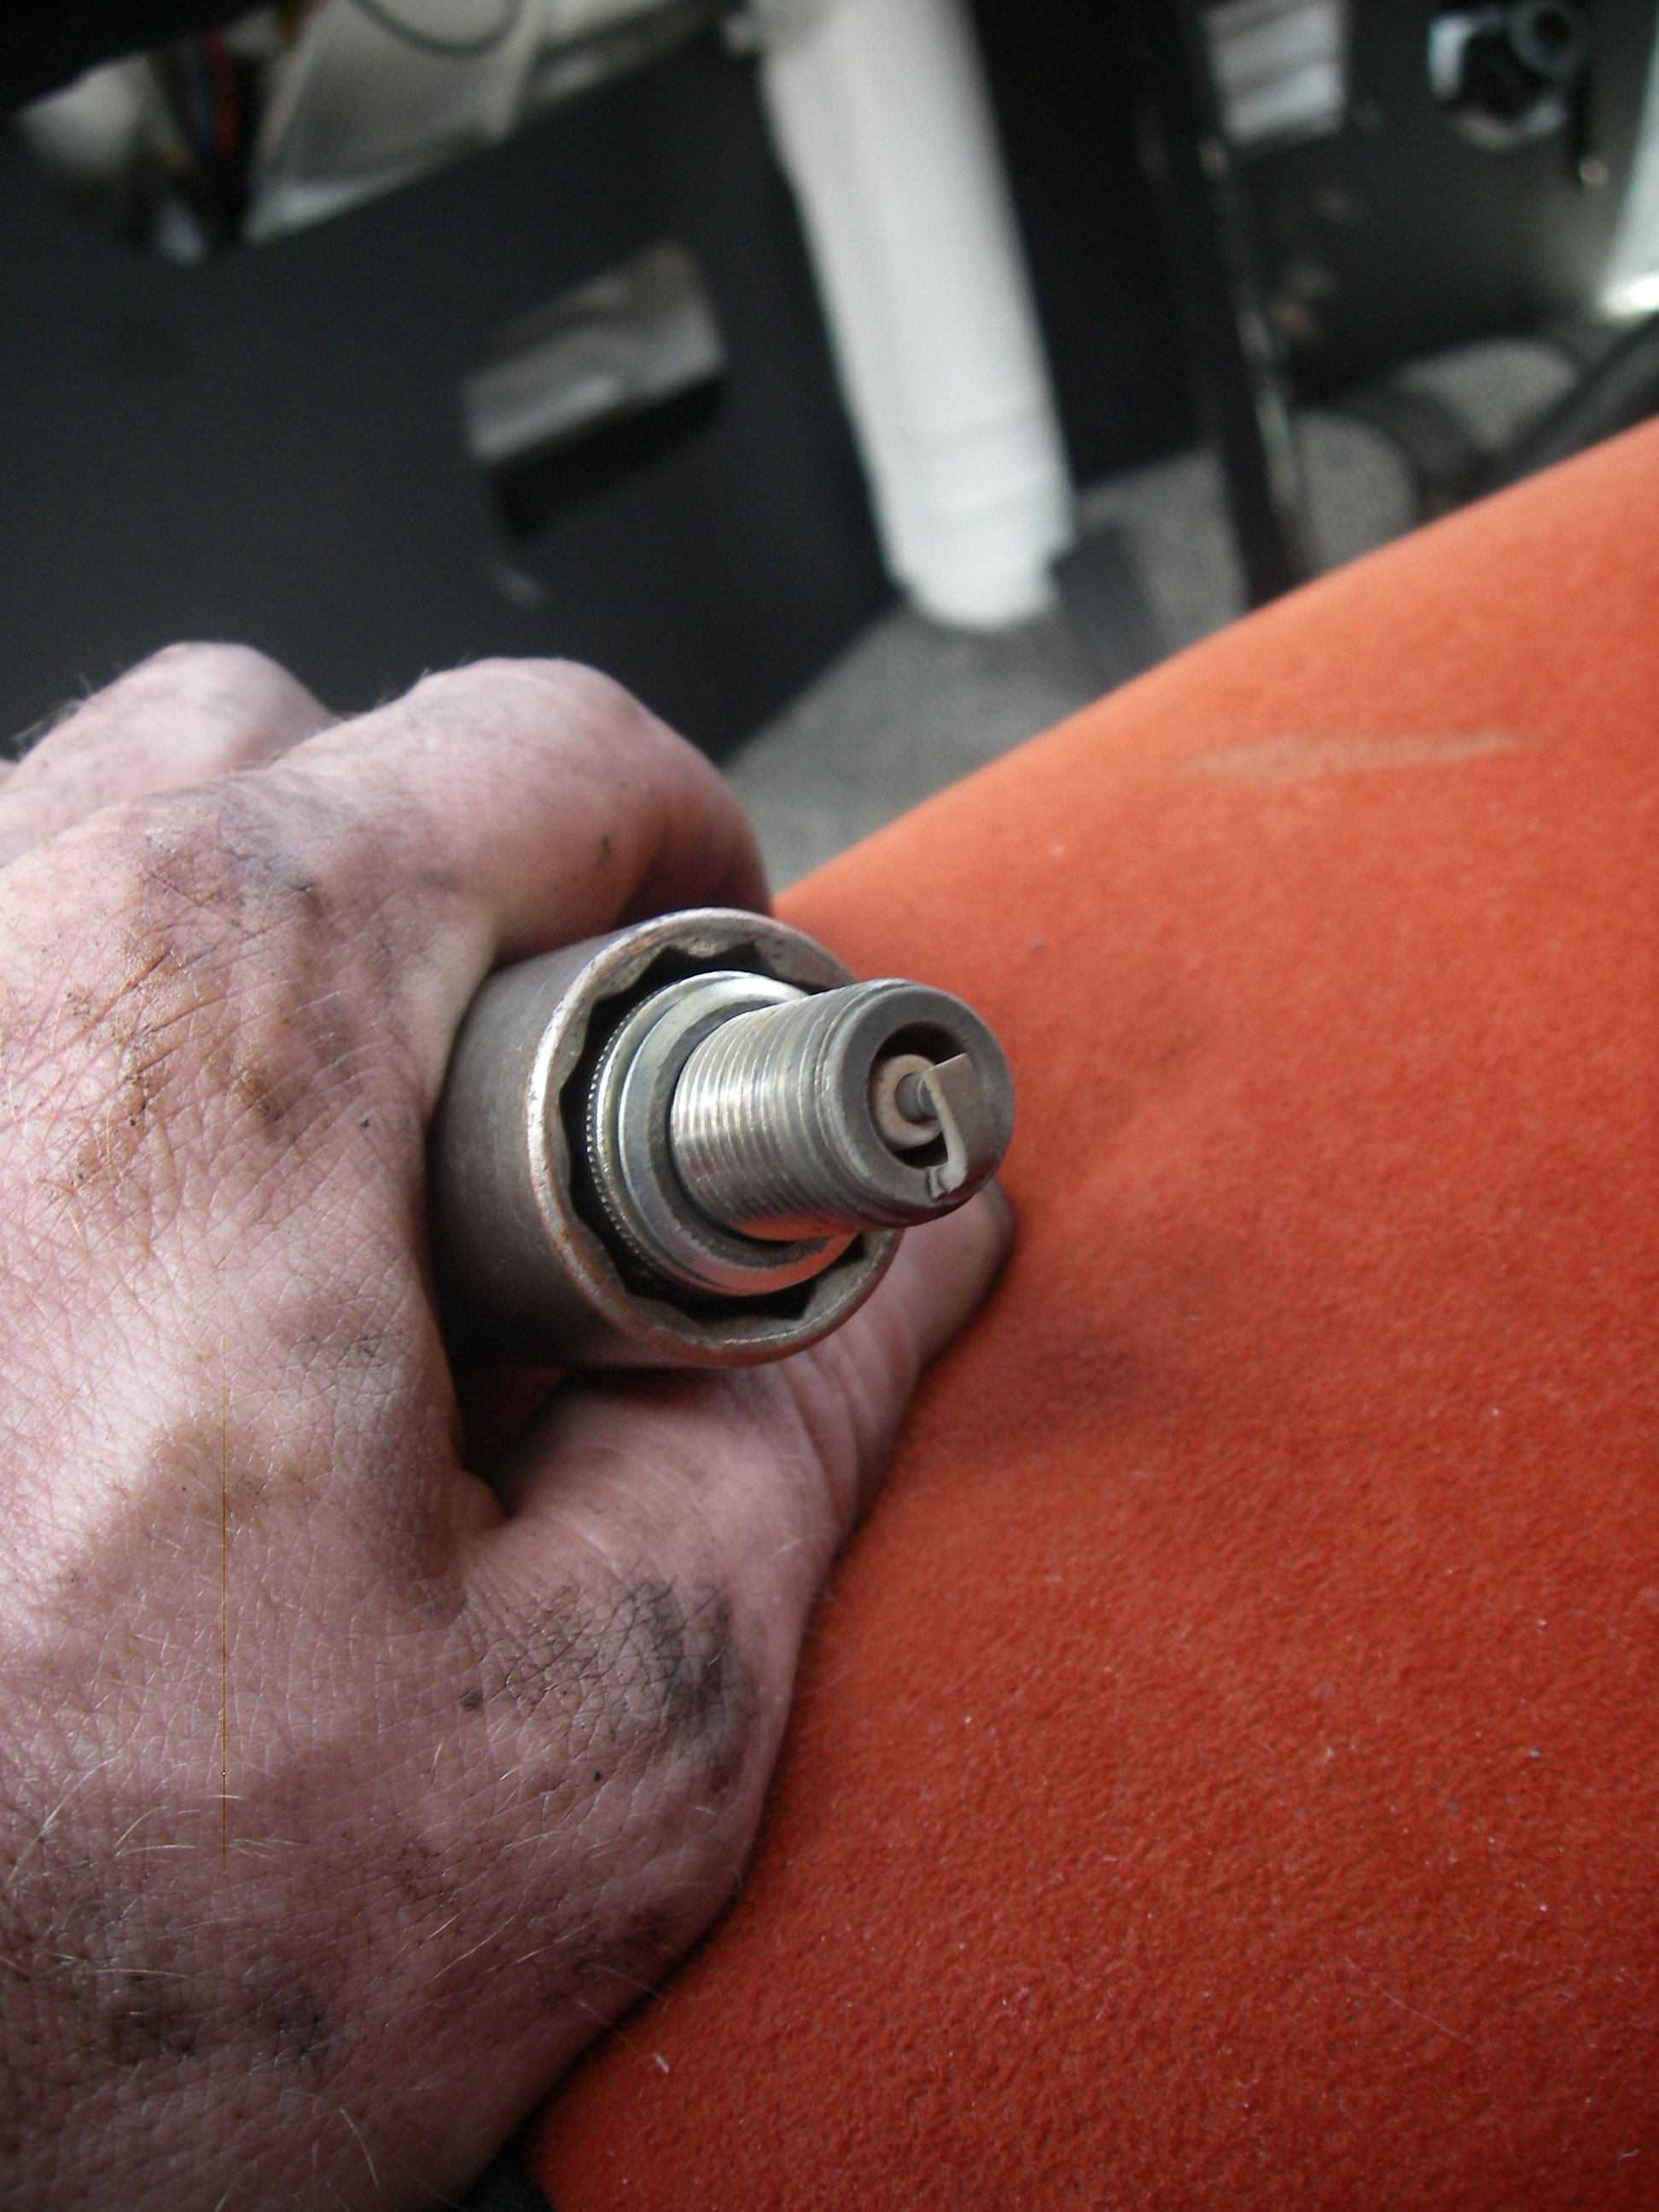
Here’s a sparkplug after 6000 miles on LPG. If it’s cleanliness is anything to go by, I think my piston barrels must be mirrored on the inside :O) With LPG at a quarter of the cost of a litre of petrol. I have truly beaten the petrol prices.

Zempire Evo TM V2 Tent – Don’t buy an awning!
VW Valve Adjustment on a Type 2.
The Solar Hot Tub
RV Solar Panels, 100 Watts is Plenty

Refillable Propane Tank by Gaslow

3 thoughts on “As the Petrol Prices Rise, Consider an LPG Conversion. Do It Yourself!”
Comments are closed.