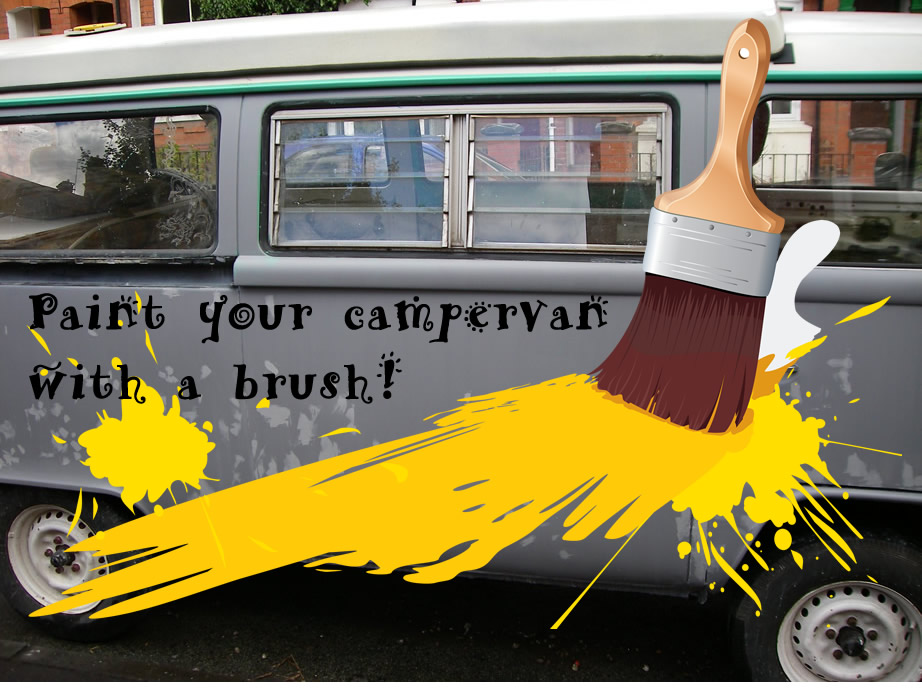
Now if you’re looking to paint your wagon on a shoestring then this is the way to do it! Let us remember that all vans were painted with car paint and a brush at one time so a perfect finish is achievable. I wasn’t aiming for a pristine job. I have gone for the mirrored finish in the past! It’s a lot of work but worth it.
This time I haven’t decided whether I even like the colour, so another repaint will no doubt be on the cards. It is possible to achieve a showroom finish but that wasn’t what I was aiming for, I was looking for a way to protect the van a little until the money was more plentiful and, maybe a better place to paint it other than the side of the road!
A Few Questions I’d Like to Answer From the Outset
- Yes it is possible (maybe not legal!) to paint your wagon on the side of the road
- Yes it is possible to get a respectable finish with a brush
- Yes you can do it for around £80
- Yes you must have a sense of adventure and start with a van that you cannot make much worse :o)
What You Will Need
- About 3 to 4 litres of synthetic enamel car paint , (Rustoleum) many have painted with this and is what I chose to do Dusty in.
- About 10 litres of white spirit (for diluting your car paint (Rustoleum) and washing your brushes
- Some good quality brushes (Hamilton brushes are reputable and again the ones I used) 2 inch brush and maybe a 1 inch brush
- Wet and dry paper (assorted grades)
- 2 litres of undercoat (I used synthetic base (optional but helps with the final finish)
- 1 tub of cellulose putty (for filling those little nicks in the primer)
- 1 tub of epoxy based filler if and as required
- Cotton rags
- Aerosol of cheap black/dark paint, (automotive)
The Process
The actual process of painting your aircooled campervan in Rustoleum with a brush is not difficult.
Stage 1: Cleaning
Get that campervan clean! Use some of your white spirit on a rag and give the whole campervan or panel you are working on, a good rubbing. Car paint/primer/Rustoleum, won’t stick to grease or silicone (which can easily get on your campervan from the guy next door polishing his car with the latest Autoglym).
Stage 2: Flatting
You want to flat the panel you want to paint. Flatting is a process of using wet and dry paper to get rid of the shine on the existing car paint and provide a key for the new car paint to stick to. You want to soak the wet and dry paper, (I use 240 grit for the first flatting) soak it for 5 minutes, and then use plenty of water to rub down the panel.
You can wrap the paper around a rubber sanding block which will help prevent finger furrows in the final finish. If you don’t want to splash out a couple of quid, then you might do well just flatting with your hand. Try to vary the direction at times so you don’t create furrows. Furrows are invisible until you start to put gloss coats on and then it’s too late. When the water dries off the panel, it wants to look dull. No shiny bits, no shiny spots, all dull. If not then flat those areas again. Try to do a larger area than just the shiny spot or you will get a dip in the paint where you have tried to sand the shine off a small area.
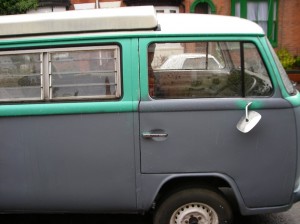
My campervan came with a badly applied primer due to the badly welded panels. Flatting away the shine wasn’t a problem because it didn’t have one to start with. It was still important to get a good key on the surface for the first coat of car paint which is the primer/undercoat.
Stage 3: Priming
We use primer because gloss won’t stick to bare metal so any bare metal areas need to be primed. I don’t think that this is the case with Rustoleum because this synthetic enamel states (I think!) that it does not require primer. In our case then a primer/undercoat will serve a very important part of painting the van. If you use a “High Build” primer, you will find that it will create a thick coat quite quickly and will tend to hide minor imperfections. I’m not going to deal with patching up rust or bodywork repairs here because this is about painting your van with a brush, but I may create a separate article about this. I painted my van with a brush 2 years ago and it needs some attention now!
Thin That Primer
Depending on the weather, the heat of the day (a dry day is essential for all painting, whether painting inside or out!) you may need to thin your primer. Whatever primer you are using, you will require the thinners recommended by the manufacturer. You need to apply it with a brush so if it is drying too quickly (and all automotive primers dry quickly!) you may need to thin it down a little. Do not expect to be able to work the primer like you would, household gloss paint. Automotive paints dry fast and I mean fast. Don’t be tempted to go back over what you have done because it will just drag and skin. You will end up with an awful mess that you will have to flat again.
Hone That Technique
Luckily, primer is VERY forgiving, and VERY good practice for painting automotive paints with a brush. Don’t worry too much, it isn’t the final coat so it will need flatting when dry regardless. Practice your strokes. Load the tip of the brush with primer and work either left to right or up to down but NEVER both or you will be going over what you have just done.
I find you are better putting on multiple thinner coats of primer rather than 1 thick one. If you get drips and runs and sags, these are real time consumers because they can take days to dry, which means you can’t move on to the next stage until they have dried and you have flatted them out. Put it on thin and if you need an extra coat, it will be dry in an hour and you can pop on an extra coat :o)

Stage 4: Flatting Again
If you have your whole panel/campervan painted in primer, here’s a little tip from the pros, get yourself a can of cheap black/dark paint, and hold it a good 12 inches or more away from the van. Spray a light mist all over your beautiful undercoat. You are aiming for something best described as a dry spray of little black dots all over your van/panel. This is called a guide coat, the aim is then to flat your campervan/panel (use 400 grit wet and dry this time and then all over again with 800)until all the black dry spray has gone!
The technique above will show up any low spots in your work, any chips, or any imperfections. They will still have the guide coat in the pits of the undercoat. You should Imagine that those little black areas will be the areas that will look dreadful when the gloss colour is applied. This will never be the case, even if, when you put on the gloss, it appears that the areas were not as bad as you thought, you will find as the thinners dry out of the gloss (over weeks) they will appear and you will wish you had spent that little extra time on the prep!
Cellulose Putty/Stopper
The pros will always tell you, that a good finish is all in the preparation. How right they are! if you have small stone chips/digs in the undercoat, it may be near impossible to remove these without removing all the primer you have just laid on. For those small areas, you can use a wonderful product called cellulose putty or knifing stopper. This is an undercoat that is so thick, that it can be spread like putty and fill minor imperfections. You will see in the following picture, that Dusty the campervan looks like he has measles.

This is knifing putty filling minor blemishes. Put this stuff on and don’t try to smooth it level with the knife/applicator, leave it slightly proud because it will shrink back as it dries and if you smoothed it off, your stone chip will reappear!
Another guide coat over these measles and flat them off again! (use 400/800 wet and dry)
Stage 5: The Final Coat(s)
Paint Type
I accidentally created this technique myself. It worked for me and I would do it again so I feel that’s enough to share my experience. Rustoleum is an American synthetic enamel. There are a few different types of Rustoleum, but the one I used was Rustoleum combicolor. The beauty of this paint is it is thinned with white spirit which is cheap and makes the whole job cheap! Many other synthetic enamels have propriety thinners and a super quick drying time so Rustoleum seems to be a good choice.
Applying Car Paint
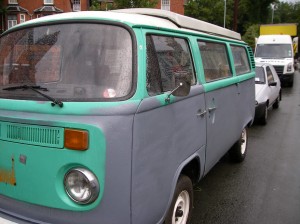
Many people have painted their cars with Rustoleum and a roller! I thinned the Rustoleum down so it was the consistency of milk. The idea is to get many coats on rather than one thick one. You can flat in between to rid any imperfections but generally keep building them up. I found that the milk consistency just ran off the panel, just like milk would really. I also noticed that it had left a perfect, albeit micro-thin, coat of paint on the campervan. You get better as you go and learn to judge how much you need to run to a shine. You can see how thin it is in this photo but rest assured, my whole van is just one big run! (but only you and I know that!)

Drying Time Between Coats
You need to give Rustoleum about 4 hours before the next coat. After 4 hours it will have rained on it, and 24 cars will have thrown grit at it. You may need to wait 8 hours tore-flatt it with 1000 grit wet and dry to get rid of the rubbish thrown up by the day.
If you manage to get your next coat on within 4 hours you will not need to re-flat it. If you leave it overnight, it will probably need a light flatting anyway to get the next coat to stick. There is a time when it is touch dry and can be recoated immediately.
Final Result
Dusty took 6 coats over three days to get it covered. To be honest, it could have done with another 4. More coats give your more scope for that perfect finish. Mine is far too thin to even begin to achieve. I was looking for a fast cheap way to protect my van and that’s what I got. More coats would be better but it’ll have to wait until I have some more time and a sunny week! Here’s a pic of the finish


Zempire Evo TM V2 Tent – Don’t buy an awning!
VW Valve Adjustment on a Type 2.
The Solar Hot Tub
RV Solar Panels, 100 Watts is Plenty

Refillable Propane Tank by Gaslow