
Wouldn’t it be great if you could see your vehicle from above when parking? Wouldn’t it be fabulous if you could confidently pull into a car space, knowing all your blind spots were covered? How great would it be to parallel park knowing you were a safe distance from the kerb so as not to damage your wheels. With an aftermarket birds-eye view car camera, you can!
How Does That Work!
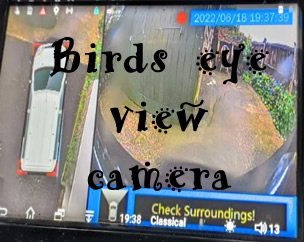
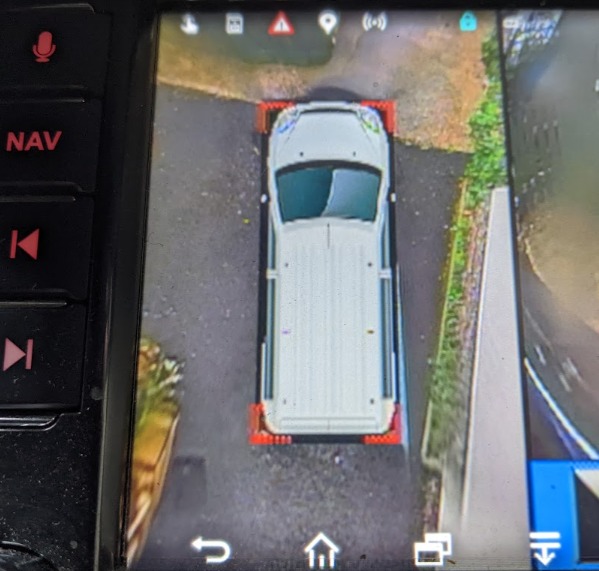
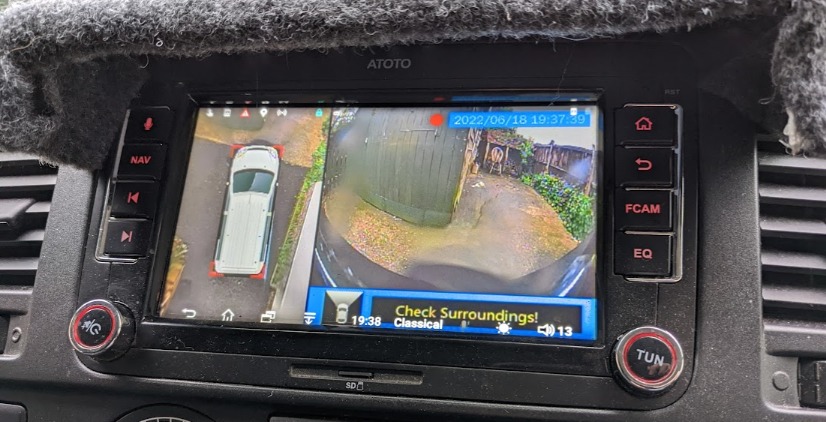
It’s a clever little system with some clever trickery used to create a birds-eye view. The system uses 4 cameras situated around your vehicle to build a computer-generated live movie of your vehicle moving. Depending on which way your vehicle is moving, the display will show that direction camera as a priority.
What Are The Prerequisites?
Here’s a quick and dirty list of things you are going to need before you buy an aftermarket birds-eye view car camera such as this.
- Basic DIY skills
- Car audio system that can receive a video input (such as reversing camera)
- A want for something so cool and useful to every driver
What Should Be on My Shopping List?
- If you don’t already have a compatible head unit then you need to upgrade. My head unit is Atoto
- Weivision 360 Bird View Car DVR Record Surround Parking System link here
- For those who want to make the job easy, cable fishing tape (trust me on this one)
- Piggy back fuse holders link here
Is it Easy To Fit?
Your fist job is to decide where the main box goes
Usually, this will go under the dashboard of your vehicle. Mine went under the passenger side, tucked up above the under-dash trim. This is where all the cables will stem from. The 4 cameras will come from here and the cables to power the unit will come from here too.
Front Camera

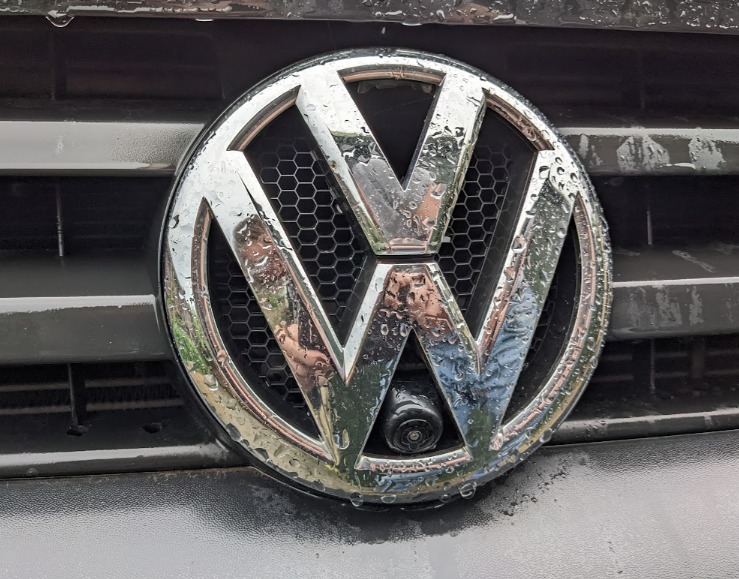
The front camera needs to be fed through the bulkhead to the grille on the front of your vehicle. All these cable threading tasks sound difficult. They are not difficult if you have the cable fishing tape I recommended. This cable fishing tape is the difference between stripping your door cards and the dashboard out of the vehicle. For under £10 this is the single most valuable tool for jobs like this. I routed the cable and mounted the front camera within the VW badge.
Wing Mirror Cameras
I routed the cables using the fishing tape, from the main box under the dash to the mirror housing. The route went through the rubber gators where all the wires pass to the door and then up to the mirrors. I only had to remove three bolts for the whole job. The three bolts that hold the mirror on. The rest was done with the fishing cable.

The cameras generally fit flush with your wind mirror. I chose the actual arm of the wind mirror to mount my camera. This meant there wasn’t enough clearance inside to house the whole length of the camera. I knew this before but I needed not to mount the camera in the part of the mirror that folds up because I have to fold my mirrors up every day when going up and down the driveway. If the system was going to be of any use then I had to mount the cameras in the arms.
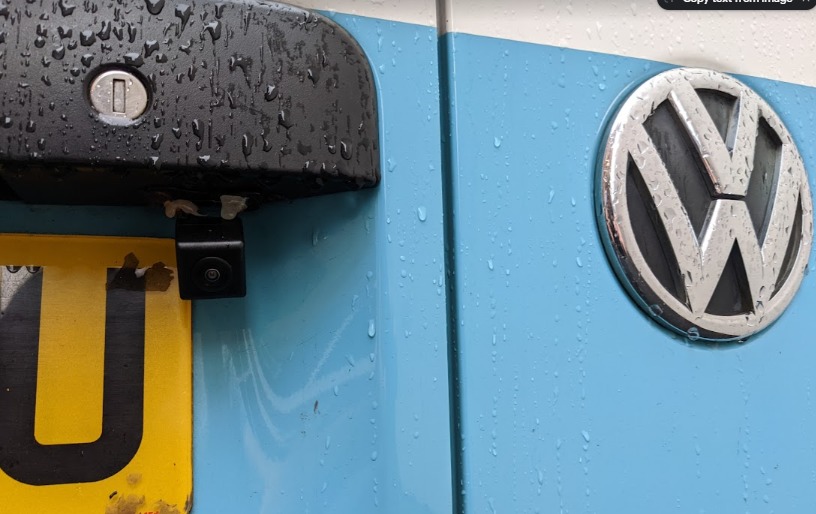
Rear Camera
Route the cable from the control box to the back of the vehicle. You can usually thread the cable behind the plastic trim so it can’t be seen. I used my cable fishing tape once again to achieve this. The camera is then threaded through the rubber gators and passed through a small hole by the number plate light.
Wiring
Next you have a few cables that basically consist of 6 wires.
- permanent live
- accessory live
- left indicator (I didn’t connect this)
- right indicator (I didn’t connect this)
- reversing light
- Main earth (usually vehicle body/chassis)
The two live wires were easy to connect. I used piggyback fuse holders to link them into the main fusebox. The earth cable was connected to the nearest metal on the bodywork. The reversing camera cable was linked to the reversing light at the back of the vehicle.
How Long Did the Job Take?
Roughly three hours to fit the cameras and wiring. Once this was done, it took about another 45 minutes to calibrate the system. This is a process of laying some provided chequered blankets outside the vehicle under each camera. Then you press the calibrate button and the computer stitches all the images together to give a birds-eye view of your vehicle. Amazing.
It’s not an in-depth guide on how to fit a birds eye view camera system into your vehicle, but if you have any questions then pop them in the comments below.
Maybe it’s time to fit solar next!
Zempire Evo TM V2 Tent – Don’t buy an awning!
VW Valve Adjustment on a Type 2.
The Solar Hot Tub
RV Solar Panels, 100 Watts is Plenty

Refillable Propane Tank by Gaslow